Saturday, February 09, 2013

Automatic remote sync BB10 Device

[ Crossposted from अनकही ]
In my previous post, I mentioned that the various sharing options in BlackBerry 10 OS make life easier. I this post, I am going to describe how to use the network sharing option to remotely transfer media from your BlackBerry Z10 and store it on an external drive, that too without using desktop software.

I have a jumbo external drive connected to Raspberry Pi which makes a home file share. It runs miniDLNA and Simple Samba to share files to all devices on the network. It is eunning official Raspbian image. The instructions below allow my Raspberry Pi ( or any Linux computer) to periodically download photos and videos from my Z10 and store on the hard disk, I do not need to connect my phone via USB.

1. In BB10 settings, go to "Storage and Access" and enable "Access using Wi-Fi". Also set the "Wi-Fi storage password" by clicking button just below it. The very next button on Z10 tells you the Z10's device name on your network and username. Please make a note of these.

2. I have a wireless LAN router which provides networking to all devices, including Z10. You need to have either a static IP assigned to your BB10 device or the router should assign a name using DNS. Please refer to your network router manual for this. The idea is that your BB10 device should always have the same IP address or name assigned to it and should be reachable with this name from Linux computer.

3. Create mount point in Linux by running command "sudo mkdir /media/bb10". Also have CIFS UTILS installed by running "sudo apt-get install cifs-utils".

4. Create a file /home/pi/SCRIPTS/download_z10_media.sh containing the following code:

#!/bin/bash -l

Z10_DEVICE="192.168.0.ab" # IP address or network name of your BB10 device, you set in step #2
Z10_USERNAME="BlackBerry"
Z10_PASSWORD="PASSWORD" # The Wi-Fi storage password you set in step #1
Z10_MOUNTPOINT="/media/bb10"

IMG_DEST="/media/mybook/11_PHOTOS" # Directory to store Photos
VID_DEST="/media/mybook/12_VIDEOS" # Directory to store Videos

copy_dir_contents()
{
dr="${Z10_MOUNTPOINT}/$1"
for src in `find $dr \( -name '*.jpg' -o -name '*.mp4' \)`
do
fl=`basename $src`
dt=`stat --printf="%y" $src |awk '{ print $1}'`
if echo $fl| grep -q jpg
then
tgt="$IMG_DEST/$dt/$fl"
loc=`dirname $tgt`
if [ ! -e $tgt ]
then
mkdir -p $loc
cmd="cp $src $tgt"
echo $cmd >>$LOG_FILE
$cmd
else
echo "exists: $tgt"
fi
elif echo $fl| grep -q mp4
then
tgt="$VID_DEST/$dt/$fl"
loc=`dirname $tgt`
if [ ! -e $tgt ]
then
mkdir -p $loc
cmd="cp $src $tgt"
echo $cmd >>$LOG_FILE
$cmd
else
echo "exists: $tgt"
fi
fi
done
}

SCRIPTNAME="$0"
LOG_FILE=`echo $SCRIPTNAME |sed -e 's/sh$/log/1'`
LOCK_FILE=`echo $SCRIPTNAME |sed -e 's/sh$/lock/1'`

echo -n "Starting " >> $LOG_FILE
date >> $LOG_FILE
# if lock file exists, no action
if [ -e "$LOCK_FILE" ]
then
echo "another instance running" >> $LOG_FILE
exit 1
fi
echo "creating lock" >> $LOG_FILE
touch "$LOCK_FILE"

# create mount point
mkdir -p $Z10_MOUNTPOINT

# Internal memory
/sbin/mount.cifs //$Z10_DEVICE/media $Z10_MOUNTPOINT --verbose -o user=$Z10_USERNAME,pass=$Z10_PASSWORD 2>> $LOG_FILE
copy_dir_contents camera
copy_dir_contents photos
copy_dir_contents videos
umount $Z10_MOUNTPOINT

# SD Card
/sbin/mount.cifs //$Z10_DEVICE/removable_SDCARD $Z10_MOUNTPOINT --verbose -o user=$Z10_USERNAME,pass=$Z10_PASSWORD 2>> $LOG_FILE
copy_dir_contents camera
copy_dir_contents photos
copy_dir_contents videos
umount $Z10_MOUNTPOINT

date >> $LOG_FILE
echo "removing lock" >> $LOG_FILE
rm "$LOCK_FILE"

Test the above script by running it from shell.

5. Once the script works from shell, you would want it to run periodically. And this should run with root permission because of the mount command. To do this, add following line in roots cron, by running sudo crontab -e
0,30 * * * * /home/pi/SCRIPTS/download_z10_media.sh
This configures it to run every 30 minutes.

Sunday, July 17, 2011

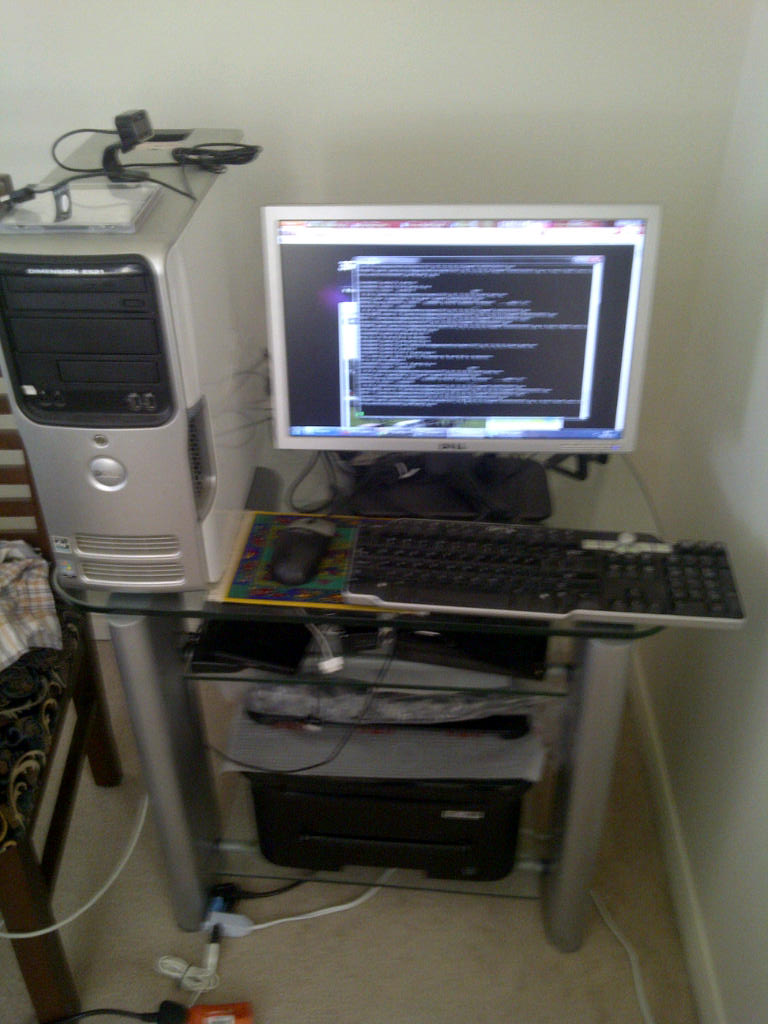
My workstation

[ Crossposted from अनकही ]
This is my small workstation.

Sent from my BlackBerry device on the Rogers Wireless Network

Canada Day Celebrations

[ Crossposted from अनकही ]

Monday, July 04, 2011

Eiffel's Cosmic story

[ Crossposted from अनकही ]
Very few people know that when it was built, Parisians did not like the iron tower. It was approved for demolition and sold as scrap. It was retained for scientific research purposes, and now became a tourist attraction.

But this tower attracted more than tourists! Dr. Wulf thought it could attract radioactivity which was actually cosmic rays increasing with height! Following is a very interesting read on how Cosmic rays were discovered.

http://www.scientificamerican.com/blog/post.cfm?id=paris-city-of-light-and-cosmic-rays-2011-07-04

Source: SciAm


Saturday, May 14, 2011

Saturday, May 07, 2011

duck family

[ Crossposted from अनकही ]
Spotted near Zehr's

Thursday, April 28, 2011

townhouses

[ Crossposted from अनकही ]

new grocery store

[ Crossposted from अनकही ]
Freshco opened near our house. This store is located at the cross of Westmount & Ottawa street. This same building housed PriceChopper till last week.

Wednesday, April 27, 2011

A view of Phillip Street

[ Crossposted from अनकही ]
Phillip street runs adjacent to my office. This was shot after the rain.

Spotted Canada Goose

[ Crossposted from अनकही ]
The Canada Goose (Branta canadensis) is a wild goose belonging to the genus Branta, which is native to arctic and temperate regions of North America, having a black head and neck, white patches on the face, and a brownish-gray body.
[From wikipedia]

It is seen in this time of year in Canada.

Spotted Canadian Goose

Img-20110425-00001


Sent from my BlackBerry

Sunday, April 17, 2011

Snowfall 2011_04_17

[ Crossposted from अनकही ]
image

image

image

Snowfall in Kitchener-Waterloo today.

Daksh's first ever!

Snowfall 2011_04_17

My first snowfall in Canada and Daksh's first ever!

Friday, December 17, 2010

Personal Book Publishing : Advanced Windows Setup

[ Crossposted from अनकही ]
Last time I described how a basic windows setup can be created. That can be used to create  a DocBook XML file and convert to PDF in an easy way. Since my requirement was to also generate HTML and ePub, that setup was not sufficient. Also note that I always preer and suggest open-source tools to be used.

For this advanced windows setup, I have installed Dobudish. This provides the complete setup to work on DocBook. You just need to download the archive and extract in a folder. Say your new book name is "New Project", then go to the install folder and give the command:

generator.bat new_project create book

This will create a new DocBook XML file of the type book in the directory documents/new_project/input/ . You can create the project of any suitable name using this command. This is just a template file. You need to open this file in a text editor or XML editor and fill in the content. You can even use Jaxe (in earlier post) to edit this. Or you can use any other good editor like Notepad++ to edit. This is your choice.

Here I would like to tell you that you need to maintain the structure of this file. The tags are not to be removed. If you need to add more paragraphs, for example, you need to add a pair of <para> tags, just like it exists already. If you use a good XML editor like Jaxe, you need not worry about this. Once you have done editing the XML file and your book is complete, you can use the following commands:

generator.bat new_project pdf

generator.bat new_project html

generator.bat new_project epub


To create PDF, HTML and ePub automatically. The output files are located in documents/new_project/output/ . The output documents are very pretty. I have been using Jaxe along with Dobudish and am extremely happy with the results.

Thursday, December 16, 2010

Crossposting Tips

[ Crossposted from अनकही ]
Out of fun, in the past, I had created accounts for blogging on various hosting sites, ranging from wordpress to xanga. Now all that is unmanageable. Same is true for microblogging sites.
Now I want to consolidate them and make my content available everywhere. Solution is to cross-post the articles so that it is posted on one site and linked back to the original site. So, I created my own hosted wordpress site where I have extreme control. Then use different tools to distribute this content.

Two wordpress plugins come handy: twitter tools and posterize.

I configure posterize to post to my posterous account when I publish any post. From posterize, the post is distributed to my various blogs on wordpress.com, tumblr.com, blogger.com etc. using its autopost feature. Full details here: http://blog.prateek.in/2010/12/how-my-blog-posts-flow/

Twitter tools plugin is used to create a status update carrying only the title of the new post. This update is taken in ping.fm using RSS feed and the ping.fm distributes the status updates in its own set of microblogging networks. More details here http://blog.prateek.in/2010/12/how-my-status-update-flows/ . Remember to use bit.ly to shorten the URLs automatically before posting to twitter.

I will honestly say that I do not like this current arrangement, but currently, this is the solution I have. I will think of cleaning all this up in near future. Thanks to posterous and bit.ly for making it possible.

Wednesday, December 15, 2010

Personal Book Publishing : Basic Windows Setup

[ Crossposted from अनकही ]

If you do not have time or courage to explore more elaborate options, Jaxe is for you. It is no frills excellent XML editor. When you start the editor, it presents an option to create a document of one of supported types. Docbook is one of the options. It is simple and straightforward, without any distractions.

What I really love about this editor is its XML capabilities. The editor knows from your document types what tags can be nested where. It helps you insert the allowed tags for that section of document, so you rarely make mistakes. Even after making a fool-proof correct XML (DocBook) document, you can validate the XML and be double sure. While inserting tags, it also presents options on that tag. You can even import any existing DocBook XML file and validate it.

Other stellar features include a built-in spell-checker, Equation editor and help to insert images. What I found lacking was: a simple icon which inserts the basic constructs like ordered lists, unordered lists, bold, italics etc.

Once your document is ready, In the file menu, there is a clear option to export to PDF. It cannot get simpler than that. What I found lacking was the missing option to generate HTML and ePub. However, PDF was my primary requirement and it did the job well.

This tool is excellent choice for quick work, no fuss solution. However, for making HTML and ePub output, I needed a more elaborate solution which I will describe in the follow-up article.

Personal Book Publishing : Introduction

[ Crossposted from अनकही ]

Last week somebody asked me that what tools to use for writing a small book. Since this is not going to any publisher, the idea is to publish the book on the Internet. It is just a hobby thing, running ~30 pages. In normal case, since it is just a hobby thing, I was about to recommend her to use MS Word and get on with it. But I wanted to have a second look and understand whether it would be a good option for publishing on the web.

Since I have not checked this area in last few years, I thought it wise to just research  what is the current trends and softwares available for the purpose. My basic requirements are simple.:


  • A simple to use methodology which does not daunt the author. It should not distract the author by providing unnecessary options and it should not be difficult to learn.

  • Since the book is intended for web reading, it should support output in PDF, HTML and ePub. For MS Word documents, readers should have this paid software installed. Moreover, people may read documents in e-book readers where you cannot install softwares.

  • It should be future proof. Few years ago, documents were written in wordstar and books in ventura. Now, it is hard to find readers which can open those documents.
  • I evaluated following options:

    MS Word: Yuk. I won't go for it. Large document support is pathetic. I is WYSIWYG, so the author gets distracted by the many options. No open support, you need to microsoft purchased software installed. Even OpenOffice is better than this. Although, if I had to write a letter or a 4-page article, MS Word would be my first choice.

    OpenOffice Word: Has good PDF output support. Low learning curve. But then it is WYSIWYG. It is better with most type of home documents.

    LaTeX: I love this from my college days. It let me focus on the technical things, and took care of every aesthetics by itself. Good thing is that it can produce excellent PDF and HTML very well. But I am not so sure about ePub. The math presentation is excellent. However, I see it having a slightly higher learning curve. huge community support. Usually popular with UNIX community.

    Lout: A newer sibling LaTeX. I like the easier syntax and nice output styles. But lack of community support and tools make it prohibitive.

    DocBook: This is an open standard. It is supported on windows platforms as well as UNIX. Has native Unicode support. It has huge number of output options, including PDF & ePub. Huge community support and best of all, it is future proof! It is very easy to explain to new user and there are good XML editors available. DocBook files are normal text files encoded with HTML-like tags. It has very intuitive XML syntax and lot of tools available. The input XML files are passed through a series of tools/programs to generate final output. That sequence is called a toolchain.

    As much as I love LaTeX, I would still go with DocBook now, for the sake of ease of use, output formats and future compatibility. DocBook files are normal text files with HTML like angular bracket tags. In follow-up article, I will explain how to setup a DocBook toolchain on windows.

    The best thing (probably the deciding factor) why I prefer DocBook XML over other solutions is that it maintains clear differentiation between design and content. The author is only worried about the content and story. The design, layout and looks can be taken care by a different person and can be worked in parallel. This segregation of design and content is very important. And anyways, even if I love LaTeX, I have the option to convert the DocBook XML to LaTeX and use it.

    I may have missed out several other good solutions, but maybe that is because I do not know them quite so well. I hope to enhance this post in future, if required.

    References:

    http://www.latex-project.org
    http://www.tug.org/

    http://www.openoffice.org/

    http://www.danielstender.com/granthinam/2152/

    http://savannah.nongnu.org/projects/lout

    http://www.docbook.org/

yet another test 2

[ Crossposted from अनकही
]sorry, please ignore this.

Another test post

[ Crossposted from अनकही ]please ignore.

How my blog posts flow

Main source: http://blog.prateek.in

Cross posted to: Posterous

As Status Update From Posterous --> Twitter (via autopost)

Twitter  --> Ping.fm   (via Rss import)

then

Ping.fm   --> BrightKite

Ping.fm   --> Plurk

Ping.fm   --> YouAre

Ping.fm   --> StatusNet

Ping.fm   --> Identica

As Blog Entry From

Posterous --> Facebook page (via autopost)

Posterous --> wordpress.com (via autopost)

Posterous --> blogger.com (via autopost)

Posterous --> tumblr.com (via autopost)

Posterous --> typepad.com (via autopost)

Posterous --> xanga.com (via autopost)